Dying Mohair!

DSC_1088

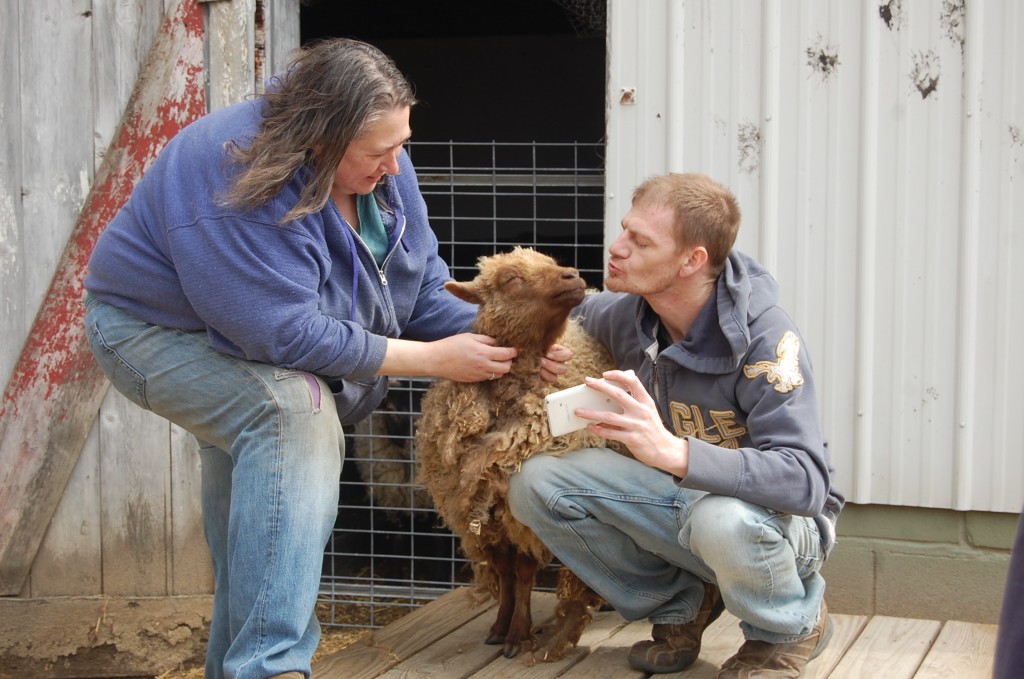
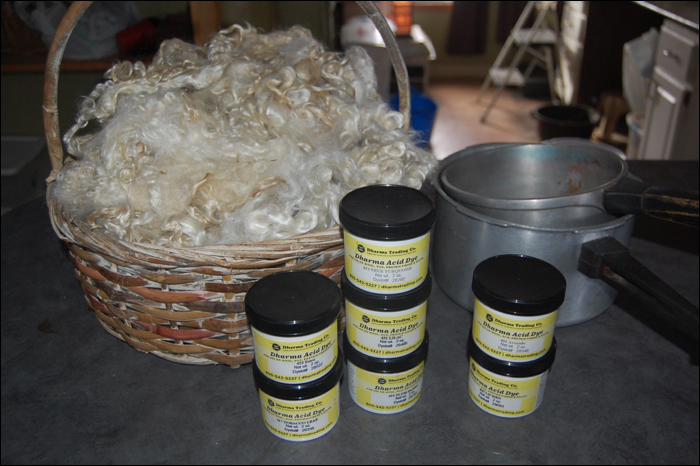
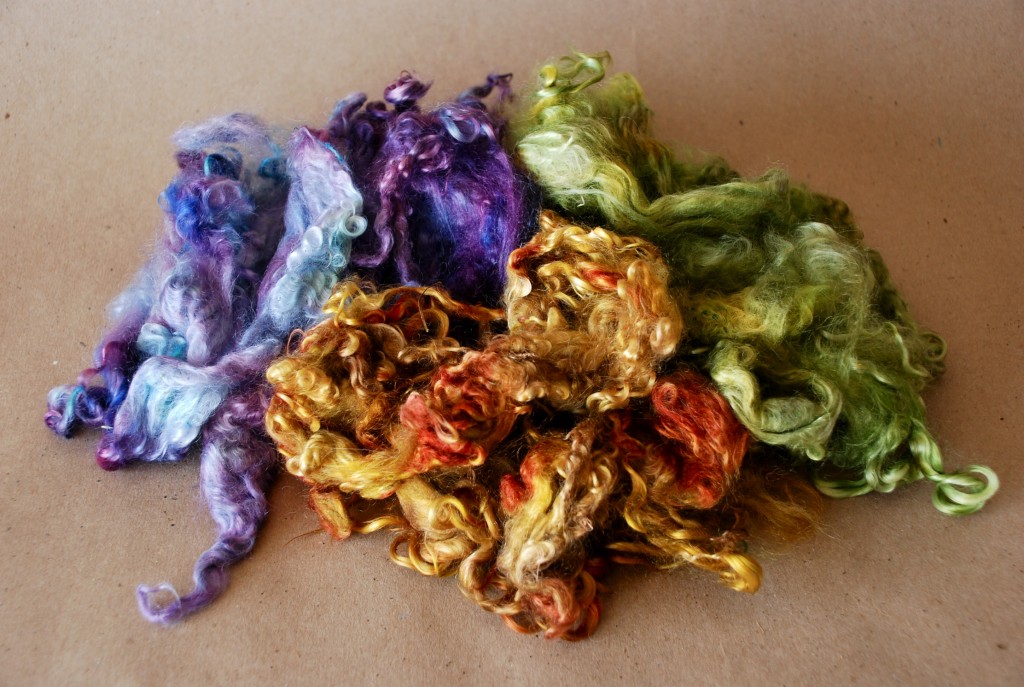
I had a couple pounds of beautiful washed mohair locks and I thought it would be fun to try ombre dying or well, art dying of the fibers!  So I picked out three different dye colors that I wanted to work within.  Green, gold and purple.  And then I picked a few different dyes in that range.

DSC_1090

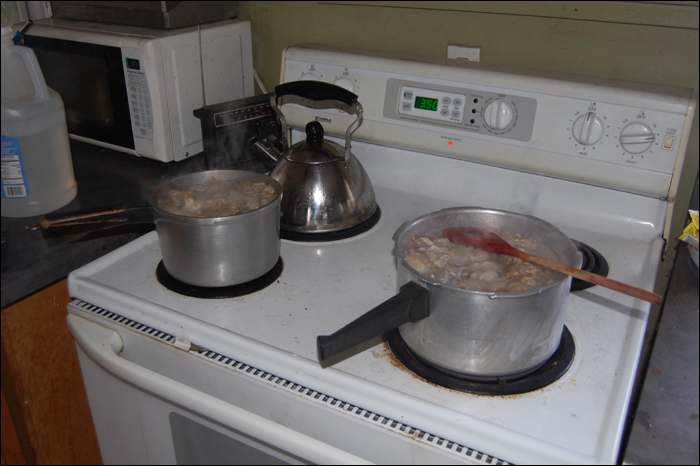
Dying is really quite easy and fun.  First you get some super hot, boiling water going in some nice old pots.  I find the old aluminum ones work best.  I got these two at a thrift store and they are my dedicated pots.  I would like to find a super nice big one, but so far…  it has alluded me!

DSC_1091

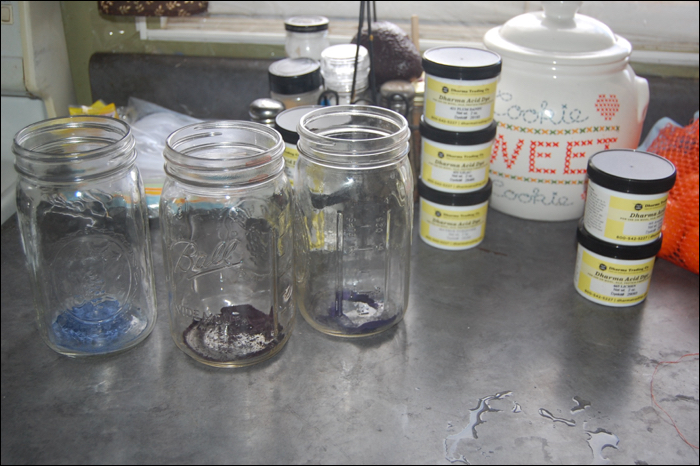
I use quart mason jars to mix my dyes in.  Just a teeny bit of dye goes a long way!  In fact, I had to buy a little teeny set of measuring spoons…  they go down to a 32th of a teaspoon!!!

DSC_1092

Just add a little of the boiling water and vinegar solution to the jars and stir well until the dye is dissolved.

Now to prepare my mohair fiber, I took a big cookie pan and laid a trashbag on it.  That way I could use the bag to do the final heat set and it would be very easy to lay the fiber out to mix the dyes on it.  You’ll see what I mean in the next photo…

DSC_1093

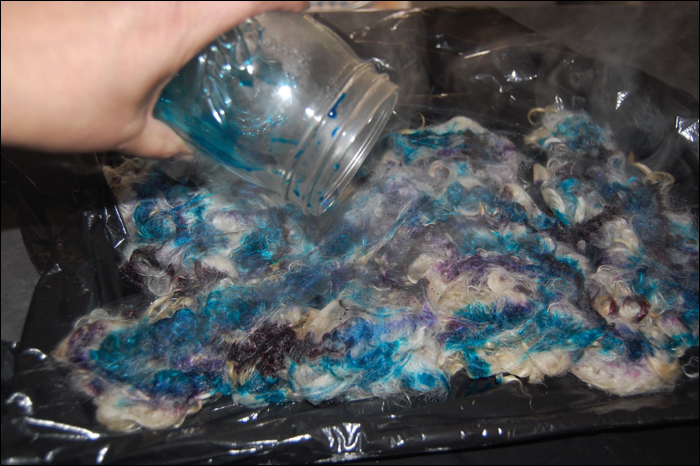
The fiber was damp, just wrung out lightly and quickly.  It’s super hot but I let it drip off most of the easy water.  Then I laid it all out.  With each dye mixture, I just swirled and poured it all over the mohair, being careful not to over lay the dyes too much.  I didn’t want them to muddy up.  I knew that some blending would happen and I wanted that, just not too much.  And I left some white because I knew it would soak up dye as it laid there.

DSC_1094

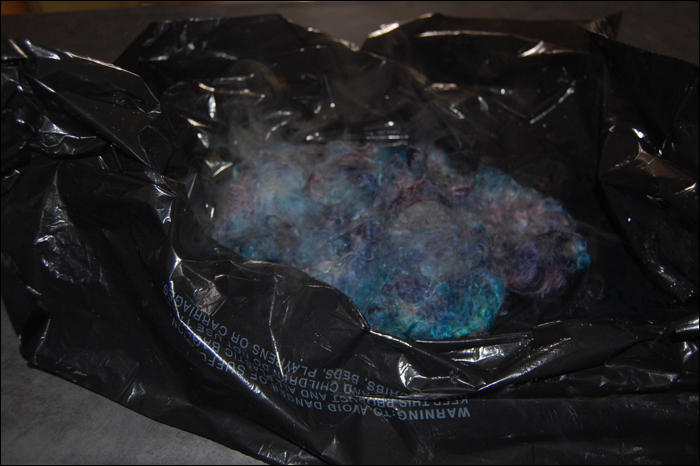
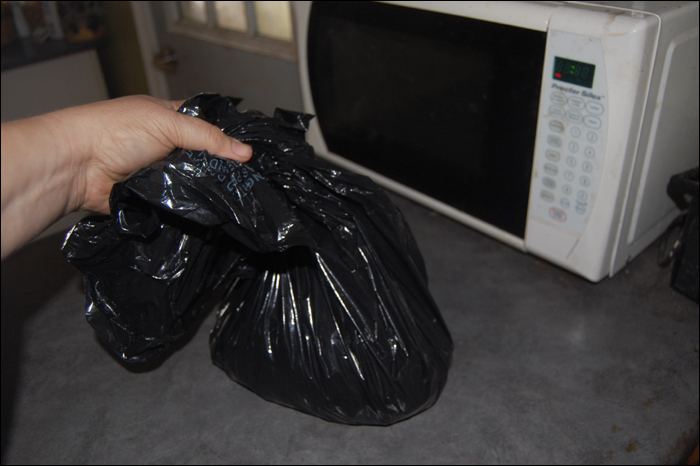
When it was almost done soaking, I used a big flat spoon to just press it all down into the dye completely, making it very completely saturated.  Then I just gathered up the sides of the bag and tied them in a loose knot.  After that, I popped it in the microwave for a few minutes.  I found that 4 to 5 minutes really steam set the fiber and all the water in the bottom was clear.  That’s a great sign that your dye has been completely absorbed.

DSC_1095 DSC_1096

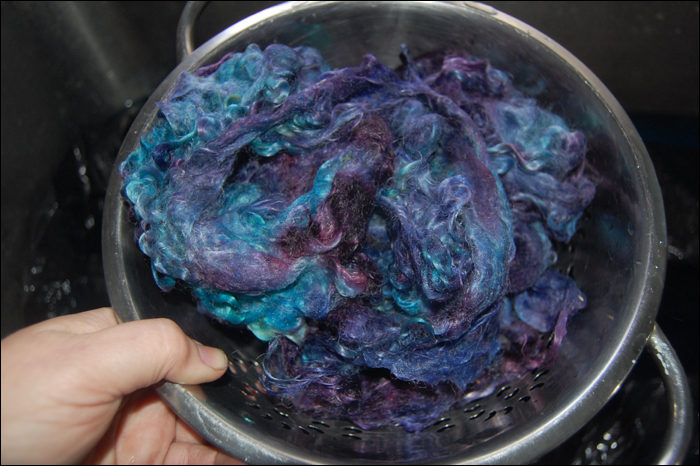
After heating in the microwave, you just rinse.  Nice warm water to begin with and then to cool.  If you did a pretty good job of matching your amount of dye with your fiber, it should rinse out very clear.  I had a wee bit of blues coming out, but the other two worked out perfect!   Just rinse until it’s all nice and clear!  Then I wring tightly to get as much water out and lay on some soft thick towels to wick out more dampness.

If I just lay the moahir on a towel, changing often, or drap over a screen to dry, it seems to take about two days.  It’s amazing just how much water the stuff will soak up!  But it’s so worth the wait.  Now, in the summer, you can lay it in the sun and it will take much less time.  I hope to make a little drying screen rack for my fiber this summer!  DSC_1097

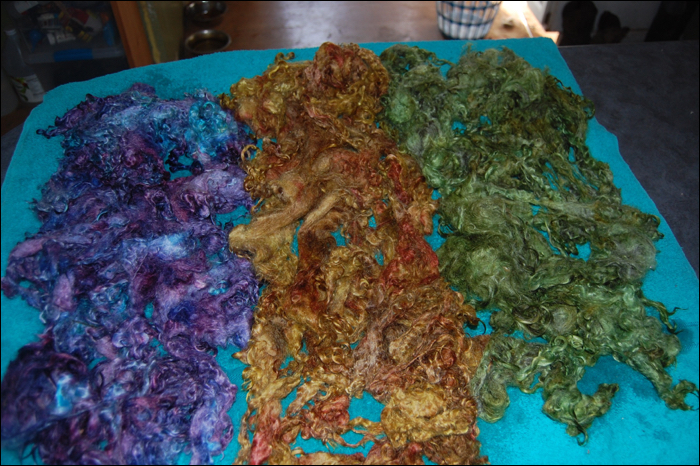
This mohair turned out so deliciously!  The colors…  oh my!  Just want I hoped for.  A light variation throughout the locks, just stunning.  So pretty.  Can’t wait to get it in the Etsy shop and also to use some for my own spinning and blending projects!  Beautiful!

DSC_10643

You can see our homestead fibers in our Etsy shop!

https://www.etsy.com/shop/WindhavenFiberTools?ref=hdr_shop_menu&section_id=17537963


Pin It

Change of Plans…

DSC_0101

It’s getting very hard to find shearers around here.  We’ve had four now and all four have either stopped servicing our area or have quit!  It’s tough work for sure…  problem is, if you have sheep, you have to shear them somehow!

Well, my friend Justin said he’d give it a try.  He’s got some clippers and has done a few larger sheep, just not Shetlands.  They are tiny in the sheep world.  So we planned for a day and got everything ready and said, let’s give it a try.

We picked Emma to start with.  She’s a sweet and patient little soul and has been sheared before and has always been very calm.  We thought that would be best.  And we started.  And stopped.  It was just not working out well.  She got a little nip and then another and that was it.  Sheep do get nicks while shearing sometimes, but it was just not right, we didn’t have the skill to do it without incurring any more nicks.  She didn’t seem to mind, we fussed over her and got some BagBalm and Blu-Koat on the boo boos and she got a big handful of animal crackers.  As you can see, she totally forgave us our inexperience and then even took the moment to watch a shearing video on Justin’s phone.  I guess she thought that sheep being sheared was cute.  She’s a goofball of a sheep. DSC_0104

Well, Justin and his son and a friend were here and said, hey, let us help you with something else!   I love friends like that!   And of course, we did have something that we dearly wanted to get done!  Mulch out our front beds!!!

Every year they get away from us. They just get all weedy and nasty looking.  I would love to plant some bushes and such up front, but we just don’t have the budget for it right now, so in the meanwhile, it would be nice if it was just HEAVILY mulched out, so that the weeds would not grow!  And the village over next to ours has huge free compost and mulch piles!  I asked and they said it would be fine for us to get a few truck loads.  Yippee!   So, off we went with shovels and a pitchfork!!!

Screen Shot 2016-03-22 at 5.23.22 PM

Three loads later, we have a LOVELY clean simple look around the house.  I wish I had taken a before shot, but well, we were all busy!  Just add a bunch of scraggly left over winter weeds and such…  we just tore it all out fast and then piled up a nice, big thick layer of mulch!  I think it looks so lovely.  It looks like a lot less work all summer long!!!  IMG_1747 IMG_6767

We even did the side here, which is always overgrown…  and then Maggie and I finished the last load in the courtyard!  It looks so nice.  Just love our truck and our friends!!!

IMG_7353

When we got all done, we had a nice big lunch of sticky chicken and potato salad and yummy cake that Jessy made for us.  I’m not sure what we will end up doing for shearing, but we will figure something out.  Still have a little time…


Pin It

Sorry for being busy…

Hey all…  nothing is wrong, just busy with a few big graphic arts projects, trying to get ready for lambing!

I figger we have about 8 days before the very first possible due date, probably more like 15 days or so until we start having little lambies around the homestead, so I’m trying hard to get all my ducks in a row and my projects off the drawing table!

I update little snippets of what is going on with our Facebook page…  if you miss me and the girls… go and check that out!

I hope to be back to blogging in a day or two..  Finished one big project on Saturday evening late and am working on one more that should be done by Wednesday.

In the meanwhile…  check out that first big project!

We redid our rock and mineral website for kids!!!  It looks so much nicer now…

www.RocksMIneralsandFossilsforKids.com


And visit us on Facebook…

https://www.facebook.com/WindhavenFarmOhio/

Related Posts with ThumbnailsPin It