
If you’re in the area… the Detroit area… come see us play! It will be fun!!! It’s $6 I believe. Lots of fun and make sure you introduce yourself!!!! I might even bring eggs!!!!
Pin It

If you’re in the area… the Detroit area… come see us play! It will be fun!!! It’s $6 I believe. Lots of fun and make sure you introduce yourself!!!! I might even bring eggs!!!!
Pin It
 Friday and Saturday this week were actually pretty neat out! Still in the 40’s and a little chilly, but there was some lovely sunshine and it was nice… We let the gang out of the paddock to frolic and run about, stretch their legs and have a little roll. They tried to graze, but there is not much green stuff yet. Soon… sooon…….

Buttercup and Daisy got to come out and play… they are just so stinking adorable! They are here meeting Uncle Cody. Whom could care less about the little worts. As long as they leave his tail alone. Buttercup tried chewing on it and he was not pleased. But it was nice to see him just flick it away with out kicking. He’s a good boy. I think most adult animals understand annoying little baby animals. If it were a full grown sheep or goat, he would have given them a little smart kick. But not the babies. He even tolerated them walking under his belly. Barely.


The dynamic dairy duo off to cause trouble somewhere else! They are so cute!

Daisy still has that terrible baby goat wobbly leg syndrome where they are so cute that you have to carry them around all over the place! haha… Maggie really likes the little girls. She lets them climb all over her when she goes out to feed them.

Here she is encouraging circus behavior in them. As if goats need any encouragement.

Ta! Da! Daisy, the circus goat!!!!

Buttercup says, she could have done that with her eyes shut!

Maggie and her little entourage! They are so funny as they follow her on her chores.

Big Blue Louie is looking very dapper this day… he is the nicest rooster! BIG!!!

See this ugly wall? Well, it was my project for the day. I scored these really neat hard plastic panels at our local wholesale surplus place. I just don’t like how the wall looks, it’s got this plastic hanging on it and it’s all studs and dirty and well, I thought there has to be a way to cover it up, make it nice for the animals, easy to clean, etc. And also that I can tuck insulation down behind there to keep the drafts off in the winter.
As you can see, I just nailed up a couple furring strips and then I nailed these panels in place! Wow! They looks awesome and the whole wall only cost me about $15. It will last forever! I need to cut that one panel piece, so we don’t loose the plug.
And I measured the top part and it’s a perfect 3 foot by 8 foot, with a 1 foot section over the doorway. So I can get just one piece of something like paneling or something and finish the top after I insulate between the planks! I’m thinking of just a piece of white paneling, so it will reflect light and brighten up the space a bit. I believe Martha would approve, don’t you think?


As I was working, Daisy and Buttercup were playing and exploring in the big barn. But at one point, little Daisy just stood in the doorway, soaking up the warm sunshine. She was so precious as she just stood quietly and looked all over at her new home and just ate up that warm sun on her little baby face!

Maggie loves roughhousing with the girls and they love it. These two are such little goofs. Such personalities! We just adore them.

Looks pretty nice, huh? I had enough to do both sides and I have 8 more planks left! I might use them on the other side, or I might save them for some other application. They are pretty neat. The fellow said he had a couple hundred but that was it. I think next time I’m in Hudson, I might pick up another $20 of them for future projects. They are a nice hard plastic and would hose down nicely. I think they would work nicely in some other areas! Perhaps in our rabbitry plans… Hmmm…..

I made a little stall in the front feed room of the big barn. We don’t really keep feed up there because it seems too vulnerable to the various critters. All you need is a pony to eat a whole barrel of grain and get very sick! No thanks. So most of our feed is in areas that critters are not allowed. Since we don’t stockpile that much this room is sort of wasted space. So I made a little nighttime stall for Rana and Rafeka, our angora goats. They like it. Just enough room for them to hang out and they like huddling under the little countertop, behind the pallet. It’s like their little clubhouse. Of course, at this point, the chickens were all checking it out. They have to approve everything we do!

Now this is a true sign of spring on the farm…. when you have to start shedding layers while you are doing chores! Of course, tonight it’s snowing and windy again… but soon… soon…. it looks like beginning on Thursday we should have some really nice decent weather. For a good four or five days in a row! I can’t wait. If we could accomplish so much in just two days, imagine what a week will do for the place! And I know all the critters would like to see the grass start to green up!!!
Pin It
Ever since we learned that we had several lovely sugar maples on the property, the idea of making our own maple syrup just seemed so neat. After all, it’s just a tap, a bucket and an open fire! And you get delightfully wonderful sweet syrup! The REAL STUFF! Not some sort of corn syrup junk with 5% real syrup added. Real honest-to-gosh maple syrup.
So I did a little research and found that eBay was the place to go and get your supplies! That and the local hardware store.
I bought ten hard plastic taps. 5/16th in size because I read that it was less harmful to the trees than the larger taps could be. Sounds good. And I got 10 feet of plastic tubing. Between the two, I spent $22. And the taps will last nearly forever, if you treat them carefully. They are a very hardy plastic, but I suppose you could break them with a hammer or something.
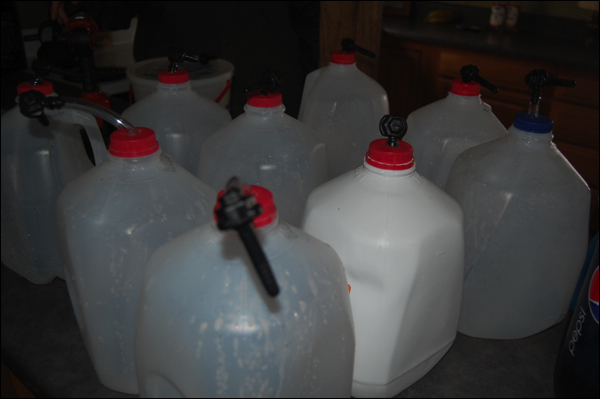
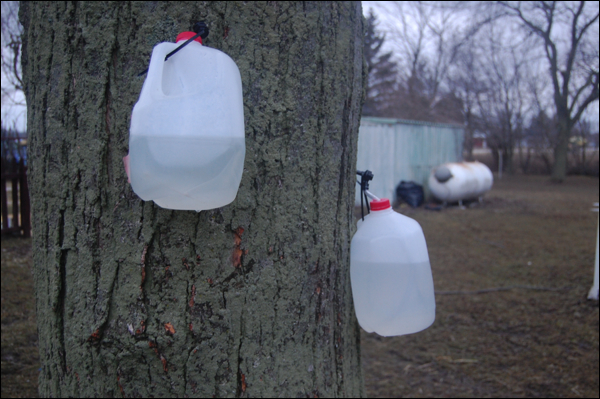
Thanks to Daisy and Buttercup, we had lots of milk jugs! You can use anything to collect the sap, but milk jugs are nice because they have a handle which you can use to tie to the tap. Some people put long tubes and just have them go into 5 gallon pails! I think next year we will do that. But this year, the milk jugs work pretty good.
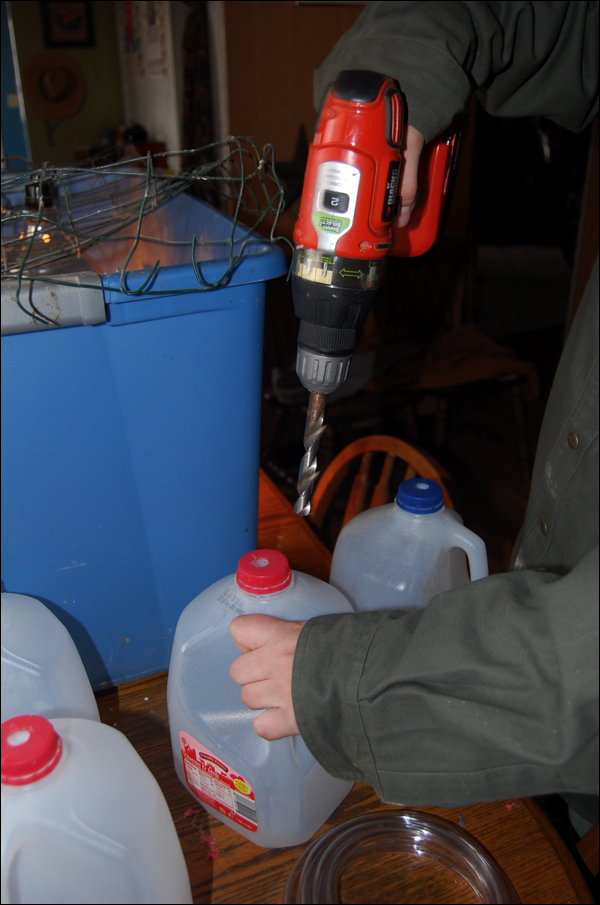
With our trusty drill, we drilled a hole in the tops of the milk jug caps. You can have it just go into the jug or pail with out a lid, but we have found that keeping the system covered means less junk in your sap. Like bark and bird poop. Generally considered less than desirable in your efforts!
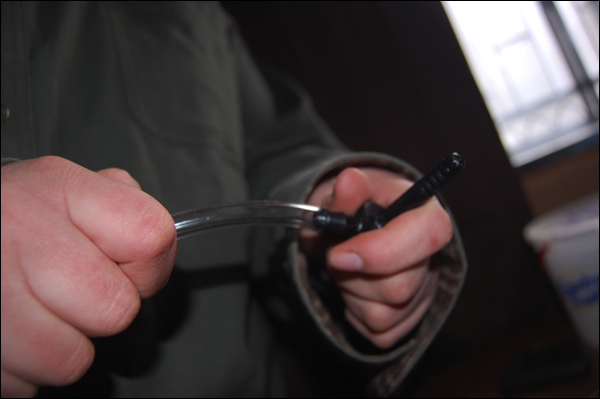
We cut 1 foot pieces of hose, jut enough to get them into the jugs with a little bit of room for wind and such. You just don’t want to waste any of the lovely stuff!
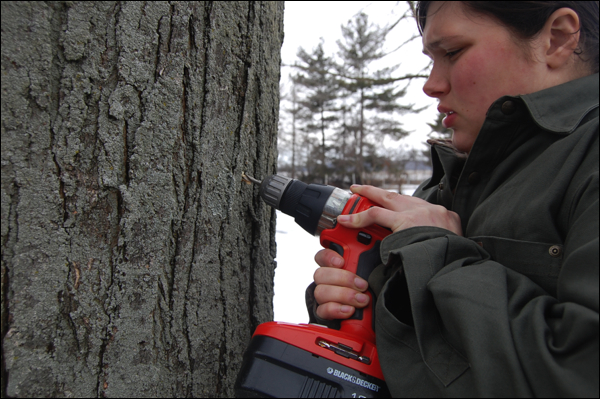
Outside, use a 5/16th drill bit and drill a hole into your tree, at a slight upward angle, about 4 feet or so off the ground.
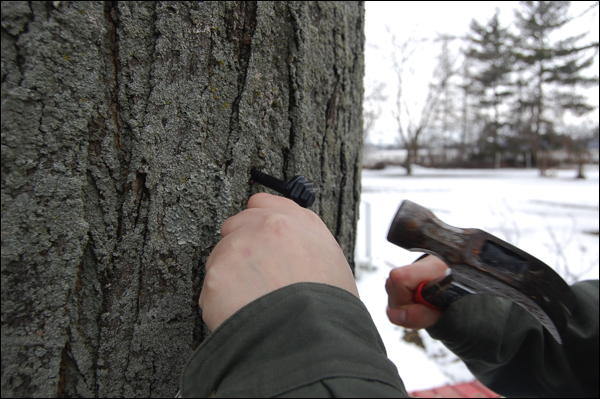
Gently tap the tap into the tree with a hammer. Your drill bit should go in a wee bit more than the length of the tap. Don’t just hammer the plastic tap into the tree… you could break the tap and it’s just not very good for the tree.
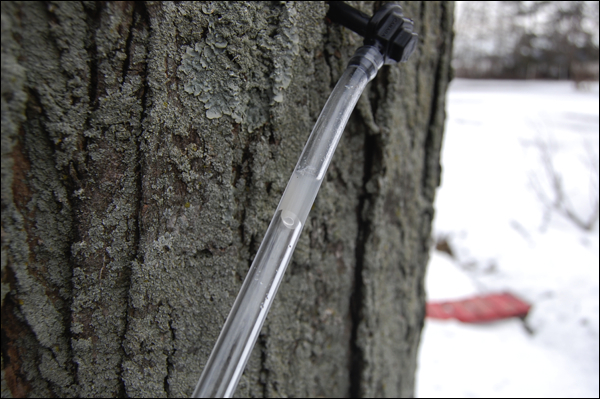
We were amazed… within a moment of inserting the tap and hose, the tree starts to ooze sap! Pretty crazy stuff for us city folk! it works!!!
You need nights below freezing and days above freezing for good sap runs. And that has been our weather right now!
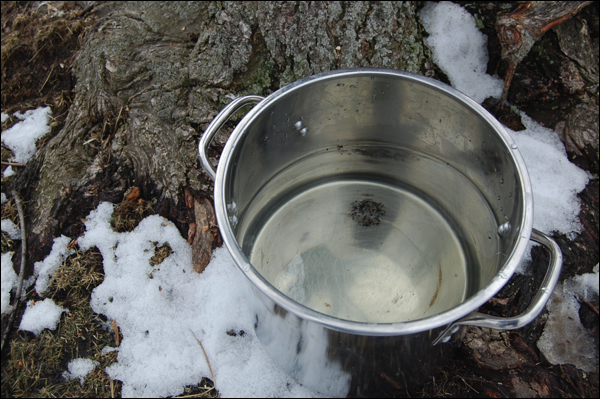
This was our haul for one day! Almost two gallons off one tree!
We had ten taps and so we tapped 7 trees. Two of our big trees, we used two taps. If you can’t reach around your maple, then you can use two or even three taps. I think for next year we will add about 5 more taps and use 5 gallon pails to make it super easy.
Now, before you get all excited… be warned. It takes about 40 gallons of sap to make ONE gallon of syrup! But hey, when a little 6 ounce jug in the store costs $9… a gallon of sap for free is like the coolest thing out of your yard!!!
You boil the sap either over a big fire outside or a hot plate in your garage or screen porch. Or you can do it in the house. But be forewarned… boiling sap lets off a LOT of steam! We did it inside, but eventually we had the wall behind our stove get very steamy and slightly sticky!!! We had to do a good cleaning after but it was time for it. Don’t boil inside if you have wallpaper!!! Just saying!
To boil, it’s best to start with about a half gallon at a time. Get that boiling good and when it’s reduced in half, add another half gallon. It seems to work better that way. It will take several hours!
We found that you don’t have to stir it that often when it’s all sap. We would stir every 15 minutes or so, when we added more sap. Now, when you get down to the end, you DO need to stir very often. It’s when it’s hitting the syrup stage that you can burn it.
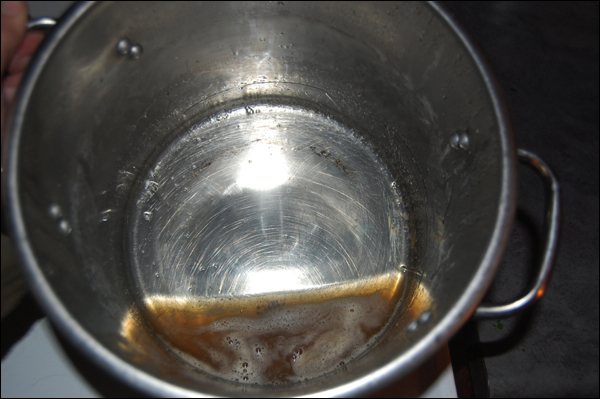
We would lift a spoonful of the boiling mixture up and slowly pour it back into the pot and watch it. At first, it will be like water. But as you start to get down to the syrup stage it will be thicker and thicker. And will start to turn a lovely light honey brown color.
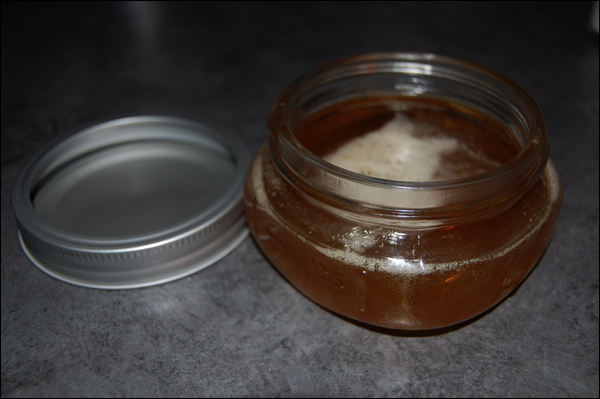
Once you get it down to the thickness that you want, you simply ladle it off into waiting clean hot jars. The syrup is SUPER hot, so be very careful! We warmed out jar under some very hot water to make sure the hot syrup didn’t crack the jars. Our first batch we cooked a little too long and it got super thick almost like honey and crystalized a bit in the bottom in the jar! We made maple sugar! Remember, when it’s hot, it will be thinner than the end, cooled product. Our second batch I didn’t heat as long and left it a little thinner. This worked out much better. Once cooled, it was the perfect viscosity!
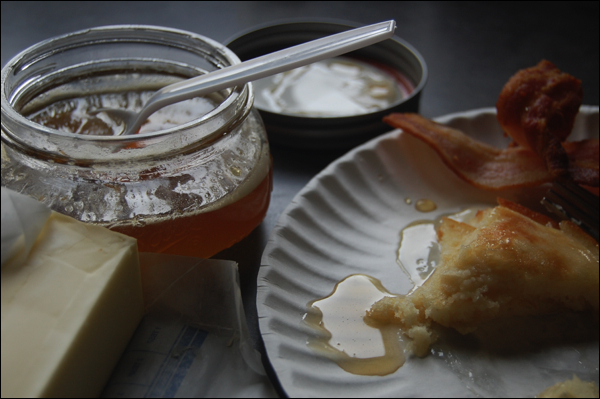
Now, you can also filter the syrup as you will get a little layer of grainy bits at the bottom. We didn’t, because it didn’t really bother us. It’s just sugar crystals and perhaps a bit of tree. (hahaha) We just don’t dig down to that settled layer when we use it. And boy, oh boy… you will use it! I think we overloaded on pancakes the first week of making our syrup!!! It’s just so good….
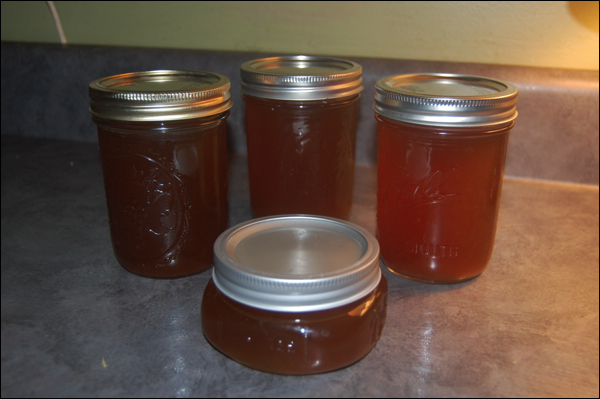
So far, we’ve harvested close to 50 gallons of sap. And the trees are still producing. This recent cold weather has extended the sugar run considerably! You can collect sap until the trees start to bud. I think we have another week or so before that happens. Since it’s SNOWING right now… I think we’re safe for another 30 or 40 gallons!
We’ve given away about 20 gallons of sap to friends and made almost a full gallon for ourselves. It keeps well, you can even freeze the stuff. We have ours in the frig at the moment and I hear that it will last that way easily for 6 months or more. I also have read that you can water bath process the syrup in clean, hot jars with new lids. I think I will do that with our second big batch.
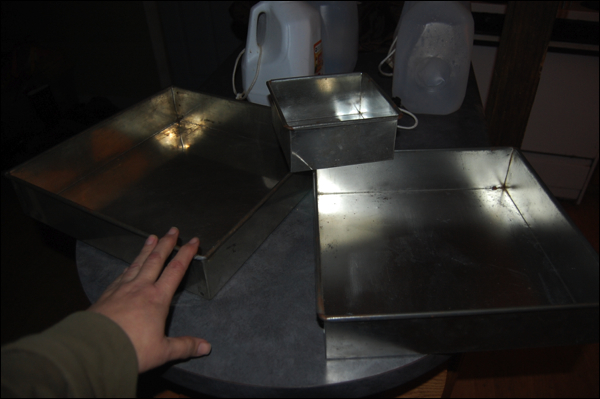
I scored this cool set of heavy duty professional cake pans at a thrift store for $5… yes, $5! I think I want to try and do the second batch of syrup outside, over a fire! A heavy metal flat pan works great because there is more surface area to boil off the water. I’m going to keep my eye out for a heavy banquet pan, as I hear those are perfect. I think that these pans, at least the two bigger ones, will work well. (If not, they are pretty cool as cake pans!) I set up a little grill in our fire pit and am just waiting for the right day to do it. Perhaps towards the end of the week when the weather gets a little more enjoyable. If you do the work outside, you can expect a good full day of boiling!!! Should be interesting. Give this a try! It’s really pretty fun… if you live in an area that you get winters like ours, you should be able to harvest enough syrup for the average family’s use! And it’s just so, so, Little House! Pa and Ma would approve!