On of my dreams is to be able to open a sort of fiber studio some day. Where I can work with fibers for spinning, weaving, sewing and crafting and also share this space with others and to offer my wares and such from my efforts and that of the fleeces of my lovely little fiber flock. I feel that I can forge ahead well enough with the spinning, weaving, and care of this dream… but one thing has been out of my reach and that is learning to dye my fibers. I just never have tried!
So when I kept reading and learning more about dying natural fibers, one of the first things several sources said was to try Kool-Aid dying! It’s simple, cheap and easy. And it will give you a chance to try it out without a huge investment. They were right! It is simple, cheap and easy… and FUN!
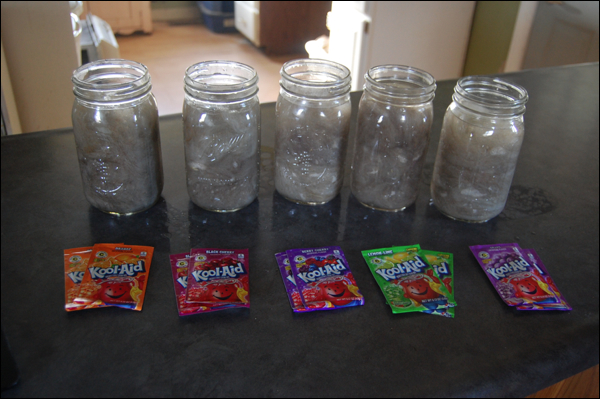
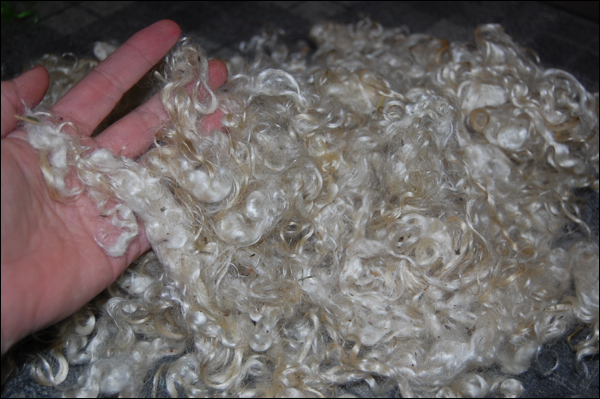
First up, you need a wee bit of wool. I am using some of my cream Shetland wool. It has been carded and washed. About 2 ounces of wool in each jar. You want it light but you can cram a bit in there. I decided quart jars would be a perfect thing. You first soak the wool for about 20 minutes in some fairly warm water. Don’t agitate and fuss with it. Just get it nice and soaked.
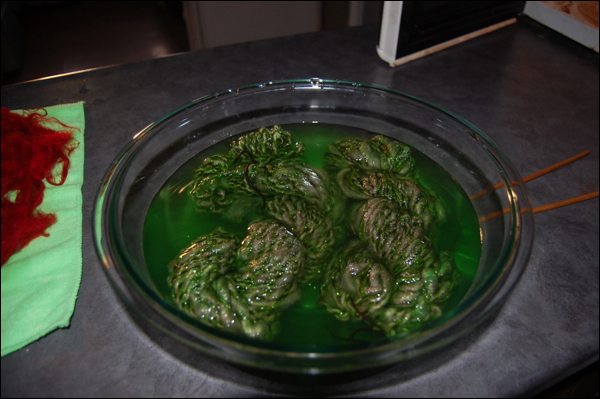
Then add in a packet of Kool-aid! If you want a very intense color, use two. And you can mix and match colors, but it’s probably best, first time, to just stick to the same color packs in the same jar. I did see some fun charts online with combinations! Just google Kool-Aid dying color charts.
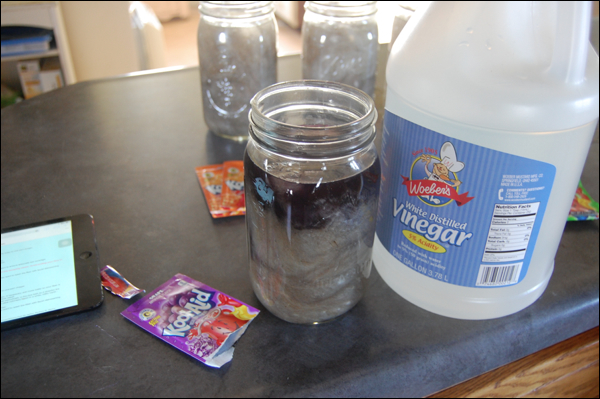
Now, to make it colorfast, you have to do two things. Add a good dollop of white vinegar and then heat set the color in the fibers. You know, I didn’t measure the vinegar. I pretty much just added a good big glug. Why so cavalier? Because all the recipes I found varied a good deal. 3 to 1, 4 to 1, 1/4 cup, 1/8 cup… Apparently, you can also use citric acid if you had it. So I thought, I’ll just add a big dollop and see how it goes. It went fine. 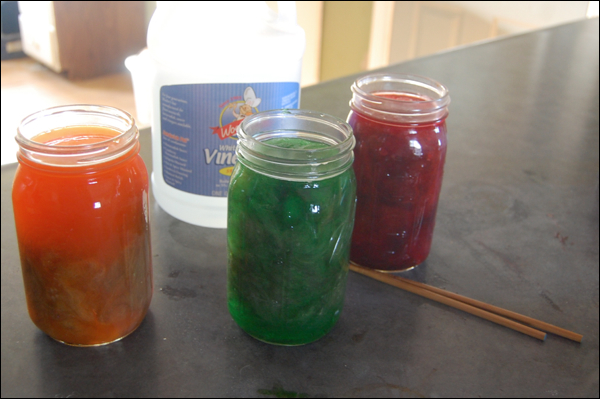
Stir it up a bit, get the pack mix to stir up nicely with the vinegar water. I suppose you could mix the vinegar with the mix in a separate bowl and pour in once mixed, but I wanted easy and not a lot of clean up. It worked great just mixing in the jar. I used a pair of chopsticks. One for dark, one for light colors.
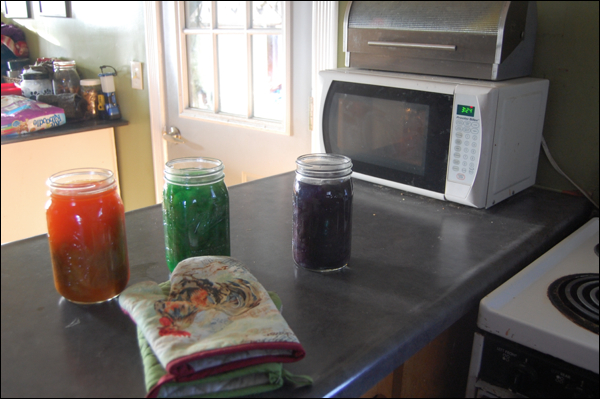
Once mixed, I popped each one into the microwave! It’s 2 minute blasts and check to see if the dye is being absorbed. Mine took about 8 minutes, or 4 blasts. My microwave just has one setting, so I guess it would be high? Again, just go simply and watch. You can also do this on a stovepot in a pot but that meant making more dishes and such. I wanted simple. Very simple.
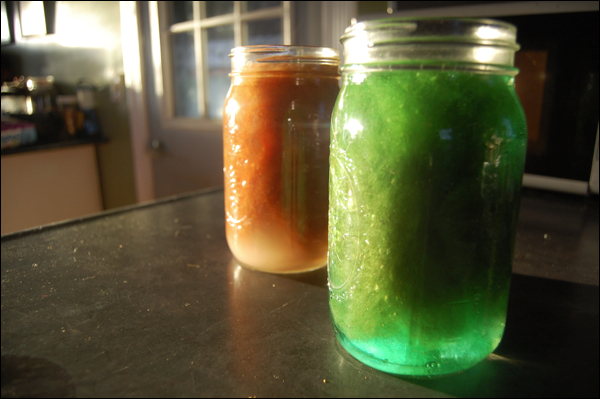
As you can see, the water is much more transparent. I never achieve perfect clear water, I guess that is the holy grail of dying. But it was much much more transparent then it began. And very hot.
I let it cool for about 15 minutes or so and then into a colander and a good rinse. Remarkably, the wool only ran color for the first quick rinse and then was clear! It had absorbed most of the dye into the wool easily. I wrung it out tightly with my hands, careful not to really aggitate and felt the wool.

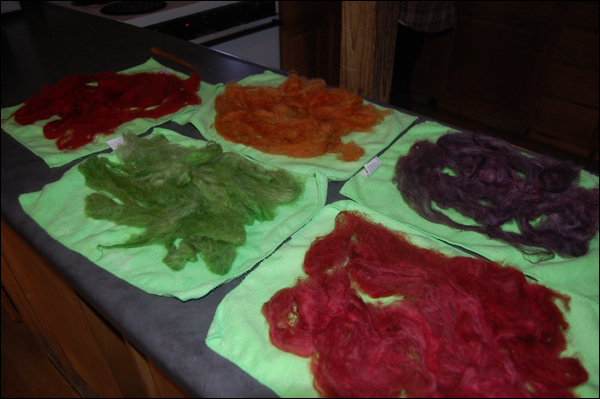
I laid it out on some towels to dry. It took a good 24 hours to really dry out nicely. I turned the wool a time or two, allowing the whole wool hunk to dry nicely. It was super easy. I was a little worried about how intense the colors were! Crazy deep! But after I began to work the fibers again, hand carding to open them up and then carding them on my blending board and spinning, they were still strong, but less with all the work done to them in the processing and spinning steps.
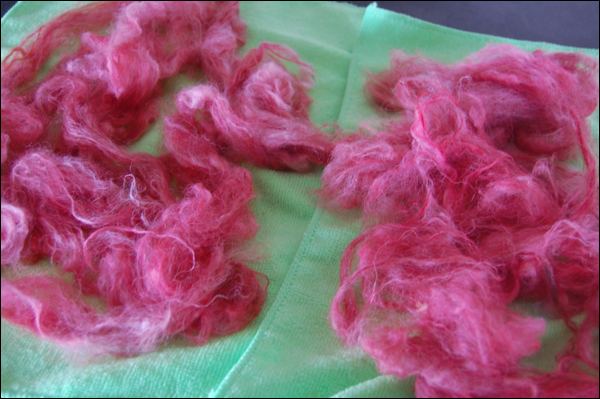

Since that was a success and easy, I decided to take on some mohair! From my angora goats! I washed it and gently picked the clean locks apart. And then I took two groups and dyed one green and the other red. Lime and Cherry. You can see that the white mohair REALLY accepted the dye well! Even better than the Shetland. It was super duper vibrant! But it brushed and carded out a bit less intense as well! Beautiful stuff! 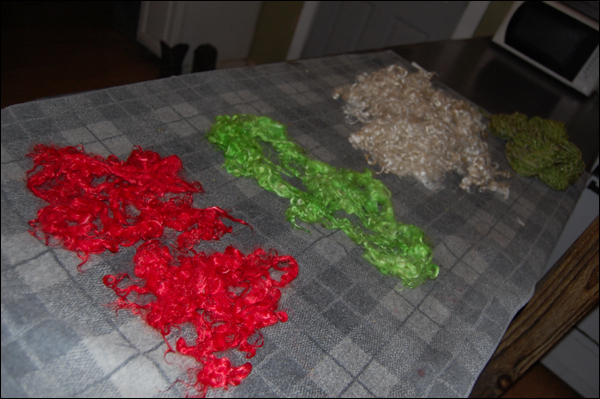
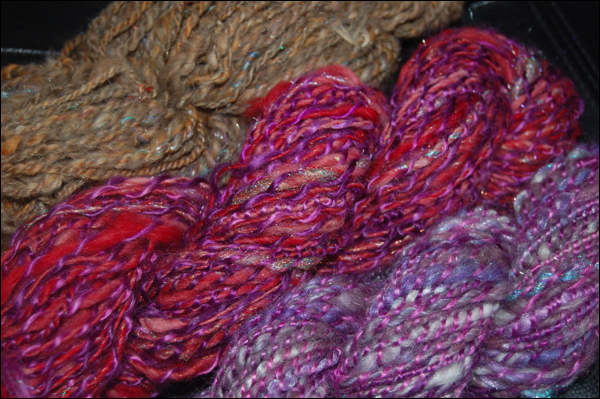
And look at the lovely yarns that I made from this dying batch of wool!!! Just beautiful! I blended orange with natural brown for the first skien… and then purple and cherry for the middle and then berry and grape for the bottom purple one. Each had both wool and mohair in the mix. Along with a little alpaca and rabbit angora as well as a sparkle of Firestar! Just a fun fun project and I am HOOKED! Can’t wait to order grown up dyes in more, well, natural colors! But the Kool-Aid was a lot of fun and I think I will play around with it again!
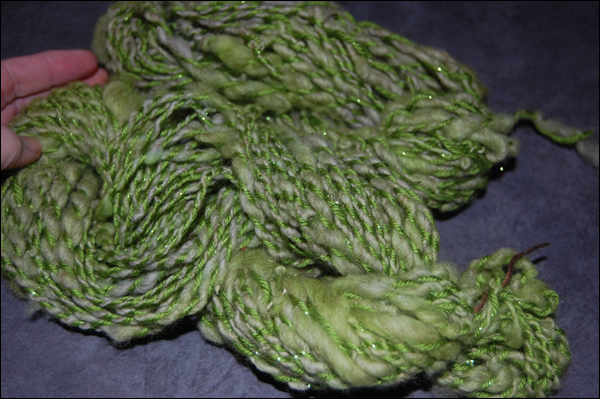
I actually did one more thing… I overdyed a skien of Shetland that I had spun and plyed with a commercial green sparkle yarn! And I just love the results. Instead of rather stark green and sort of gray cream natural wool? The natural dyed a light green and just made it almost tweedy in nature. Just really pretty!!! I saved some and then some are in our Etsy shop! Just super fun and interesting. I just can’t wait to give grown up fiber acid dyes a try! Just gotta wait a bit and order some from an awesome fiber everything company… www.DharmaTrading.com! Yah!