Buttercup the goat and I have been making cheese. A lot of cheese. Every other day, cheese.
And lately, we’ve been making Chevre… it’s a French farmer’s cheese made from goat milk.
It’s super easy to make. I would think you could even make it from store bought cow milk, but I haven’t given that a try since I have a milk goat. But I wouldn’t be surprised if it worked.
It’s just a super easy way to convert a lot of extra milk into something that can be used in a lot of wonderful ways and keeps a bit longer as well. And it’s super easy and fun. I am pretty sure that farm wives just didn’t always have the time to mess around with fancy hard cheeses and other semi soft that needed a lot of processing. They had enough going on. So this farm cheese is just so easy and so quick! Here we go.
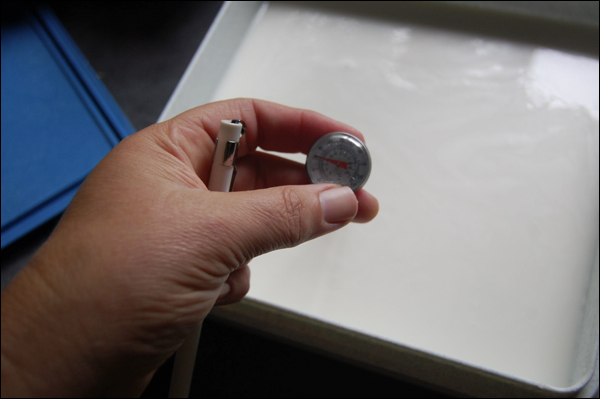
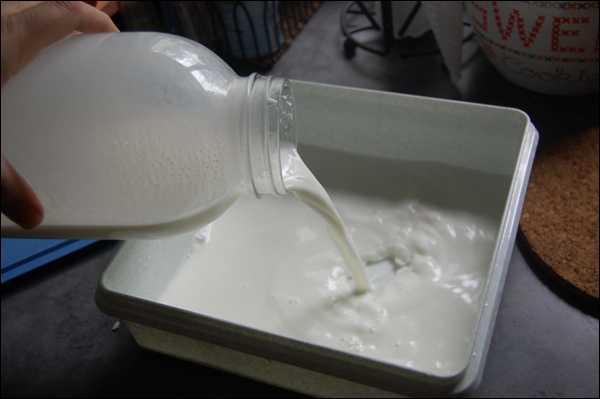
I just work with fresh from the goat milk. The temperature you want your milk to be at is about 86 degrees. I find it comes out of Miss Buttercup around 90-95 degrees. So I pour it into my lovely Tupperware container and clean up my milking equipment in the sink. By the time I’m done, the milk is ready. I used to test it all the time but I’ve found that it works just fine as long as it’s close to 85 degrees when you add your culture and rennet.
I use a mesophilic culture. You can get it from lots of cheese supply places online. You get quite a few packs for very reasonable prices. For a half gallon of milk, I add a half packet of culture. I also add about 4 or 5 drops of liquid rennet. The little bottle of rennet lasts and lasts and lasts in your frig. I suspect that you might be able to make this cheese without even adding in the cultures! I will have to check on that. In the meanwhile, the mesophilic culture is the recommended culture of choice for Chevre…
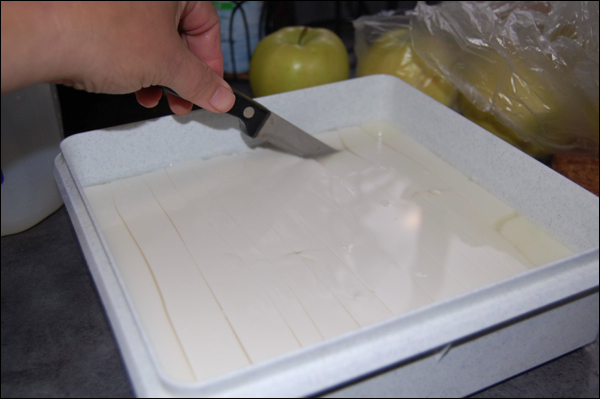
Once you add the culture and rennet, a minute step at the most, you just put the lid on and let it set for about 12 hours and firm up. I usually milk in the later afternoon, so I let it go until morning. Once you are ready, you just have a fun time and cut the curds up! I go and do first thin slices one way, and then cross ways and then at a diagonal. The goal is to cut up the curds enough to help release the whey. I then pour off the excess whey into my hog and chicken treat milk jug! They LOVE this stuff. I know some people drink it, but I think it’s a little yucky. But hey, I’m not a big seafood fan either and lots of people love that! To each his own.
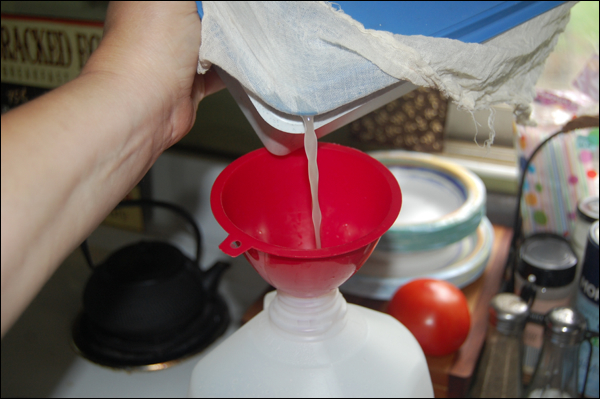
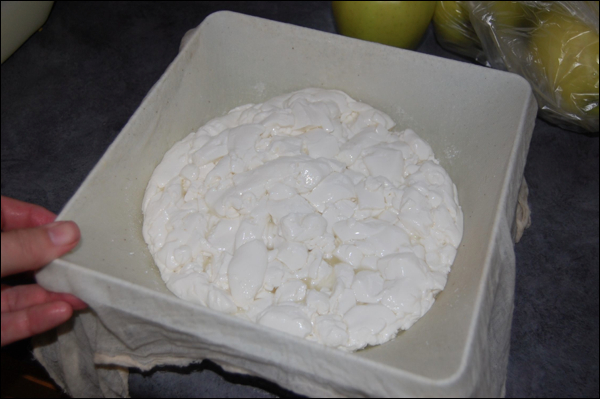
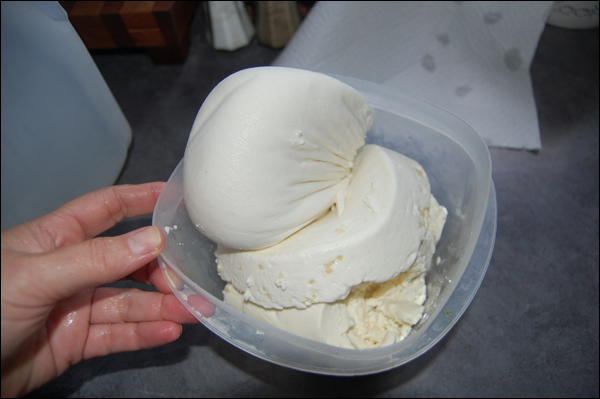
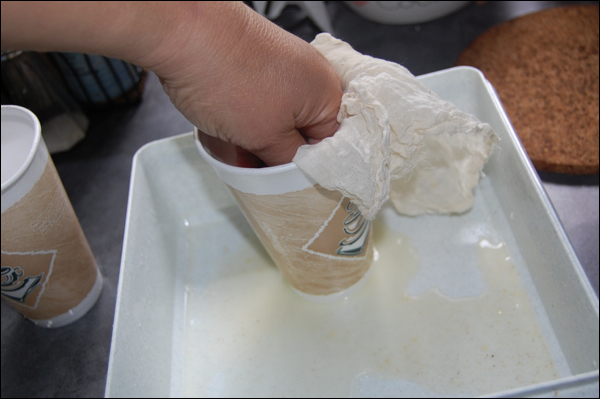
Once I have poured off as much whey as I can, I pour the curds into a clean, wet piece of cheesecloth and hang the cheese over something to catch the last bit of whey. My Tupperware works so fine… I can just hang the cloth over the edge and with the lid, pull the dripping cheese way up in the container to drip out that last bit of whey. I pop it in the frig to drip until milking time in the afternoon.
You get into a sort of rhythm with this cheese, it’s really quite marvelous. Each step just takes a few minutes, really! Even pouring off the whey and hanging the cheese, five minutes, top!
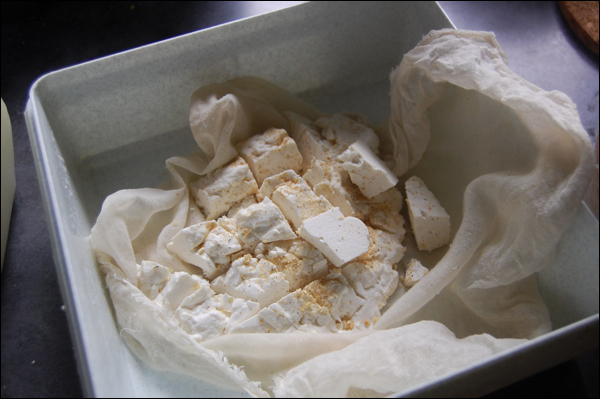
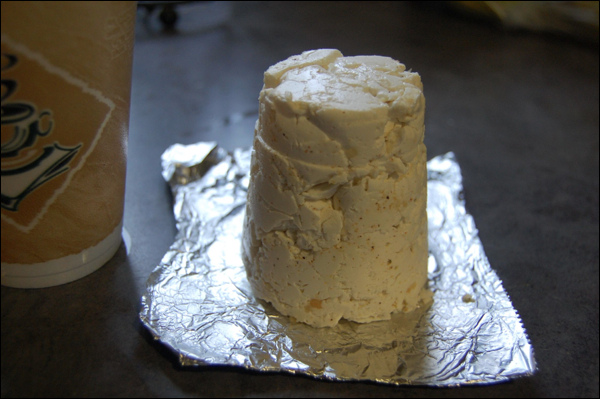
Once the cheese has hung a few hours and it seems nice and firm, you can either just eat away or you can spice and mold your cheese. I have done both. Right now, we are on a savory kick to our add ins. I sprinkle a little sea salt, garlic powder or fresh garlic, and a bit of season salt. Not a whole lot, just enough to give a little kick. The chevre is a somewhat bland cheese, not too crazy because, well, it doesn’t have a lot of time to develop complex flavors. But what is wonderful is that because it is a bland cheese, it pairs well with all sorts of lovely things! You can do savory or sweet, either works great! In fact I’ve heard that chevre is great in cheesecake and equally great in pasta dishes! You can really play around with this stuff.
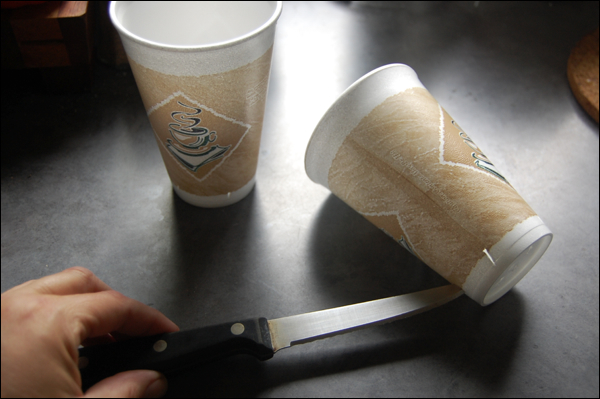
I use a couple sytrofoam cups to mold my cheese sometimes. I just poke a few holes in one cup and then nestle it in another to catch any wee bit of whey that might drain off, still. Of course, you can buy fancy cheese molding forms as well, or use anything you have around, perhaps yogurt cups or cottage cheese containers. Anything to press and compress the cut curds into a nice easy to use shape.
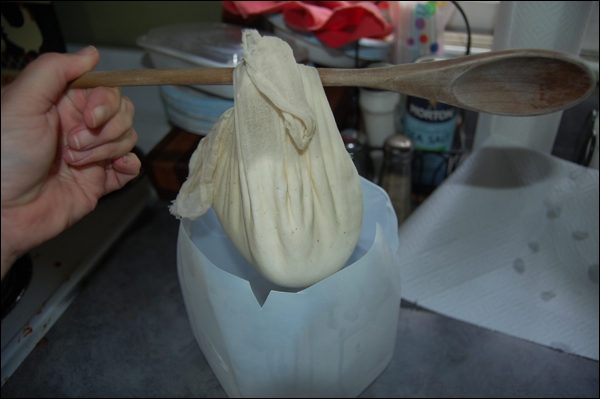
Now, since I have been making quite a bit of cheese, I did make this little hanging bucket for the frig! I just used a water jug and cut off a little top area and made a couple grooves to hold my wooden spoon. This works great for larger batches!
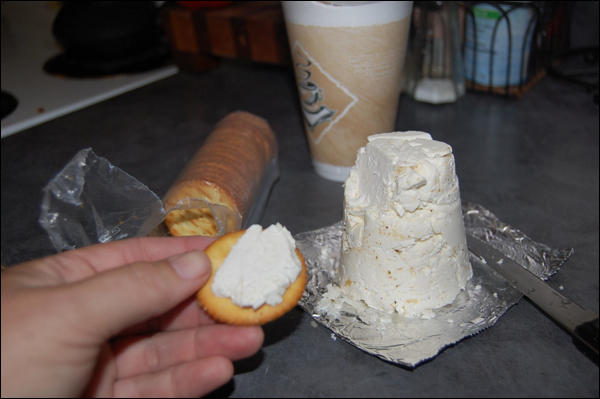
I think I’m going to keep my eye out for something a wee bit bigger, since I’ve started to really make a lot of cheese and I want to share it with friends and such. My cups work ok, but they do get a little beat up quickly. I think a stronger plastic or even a glass container or something might just work a bit better. But hey, I’ve just used it from the weird hanging shape as well. It tastes great no matter what shape you mold it into! It’s awesome on salads, on crackers and in pasta dishes… And I hear you can let it age as well and the flavor intensifies! Sounds good to me!
Cheese is SO cool! We are going to start making some other cheeses as well. Ricotta is super easy as well, and I love to make Fromage Blanc… Oh, the wonderful things a milk goat brings to the homestead table!!!