
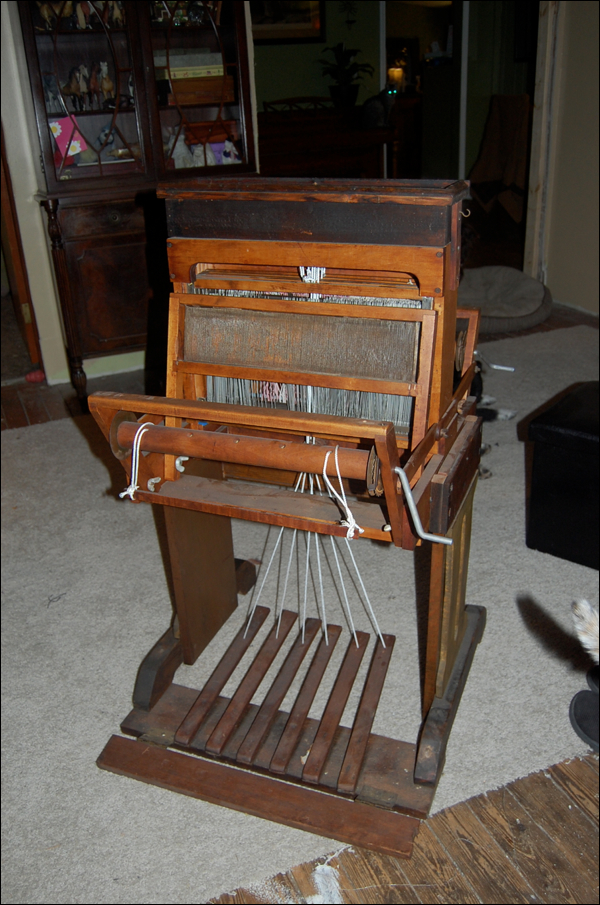
Not sure if you remember, but this summer, we bought a run down little weaving loom. It was the loom of an elderly lady’s mother and had been sitting in her attic for over 65 years since the original owner had passed away. The new owner, herself, was preparing for a downsizing move and the loom had to go. We got it for a song.
We named the loom Margaret. You know us, we name things. It’s just something we do. It helps in a house full of old things to know which loom or thing we are talking about. The owner’s name was Margaret, her daughter’s name was Margaret and our Margaret (Maggie) was restoring it. I don’t know about you, but I think it was clear what this delicate little lady’s loom should be named.
Well, after a few months of casual repair, cleaning and refurbishing, finally Margaret was ready to be put to her biggest test. Would she weave? She still has a few little tweaks left, like the reed needs to be completely cleaned of some light rust and she wobbles a little too much, but these shouldn’t stop her from being ready to weave.
First task is to get warp strings on her. You can do that in several different ways, but we decided to try the wind on the loom front first, thingy. I’m not sure if there is a name for this type of dressing a loom but it was something we’ve never tried so we wanted to see how it worked. And it worked nicely. We got a wonderful overall tension to our warp, better than we ever have on Ikea, our little Swedish loom like Margaret. Rosie, the rug loom, is a sectional loom and is warped in a totally different manner. We have tried to warp with a warping board, but we are just awful at that. I think this manner will work well for us.
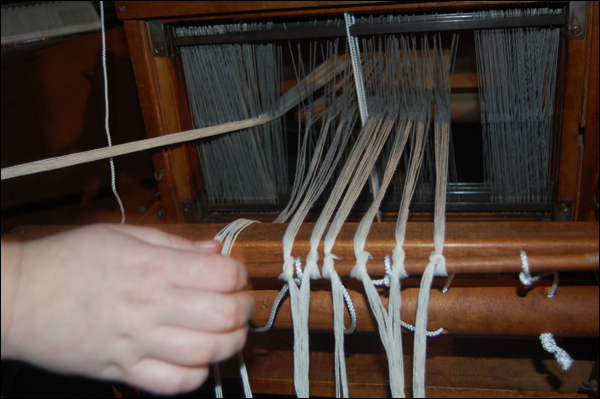
Basically, you tie off the end of the warp on the take up bar of the front of the loom. And then you pull through a loop of warp through the reed. We moved the heddles out of the way. Some folks even thread through the heddles, but we decided not to, because you have to pull one string back through when you get done and that just seemed too much work. You have to do one or the other, because that is how to keep them all nice and untangled. 
Then you take that loop and pull it all the way out to a stationary peg you have clamped somewhere. You can use the back of a chair, anything that will be tough enough to handle the light stress of the warp on it. We clamped down an inkle loom! Worked great. Back and forth, treading through the reed, skipping a hole, and then thread another loop. You skip a hole, so that once you cut it free, you can pull one and rethread into the next hole. Hope this makes sense.
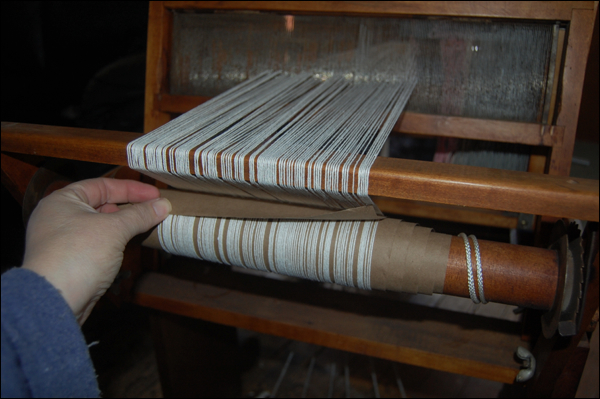
Once you have it all threaded, one person takes the end off the peg and the other slowly winds the warp onto the take up reel in front. We finally understand why people like to use brown paper on their warps! It prevents the strings from tangling with the previous layer and just keeps it all nice and wound pretty! Look at that!!!
Once it’s all on the front take up reel, you clamp it down with something. Leave enough through the loom so you can work with the ends and such. We left about 2 or three feet. I used a ruler and a piece of thick wool underneath, with two wood clamps. Easy! The wool just pressed tightly to the strings and made it the perfect touch. You clamp because you don’t want to loose the tension that you wrapped onto the bar while you fool around with all the strings of the warp, through the heddles and such.
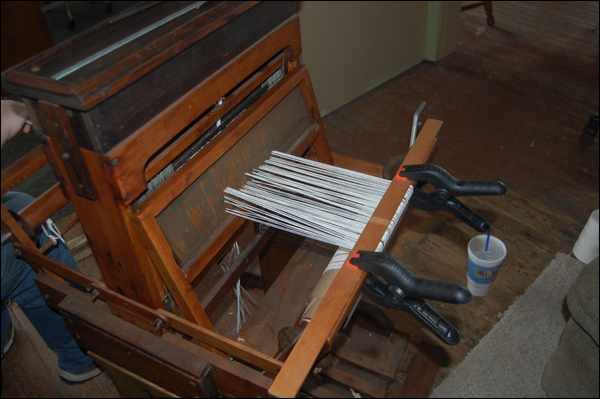
Jess cut the warp from that loop, that you made from looping around your peg or stationary object. She laid them out in two nice bundles, hopefully to prevent tangling. And it worked fine. There was just not enough to really get tangled, but enough to be able to work with. 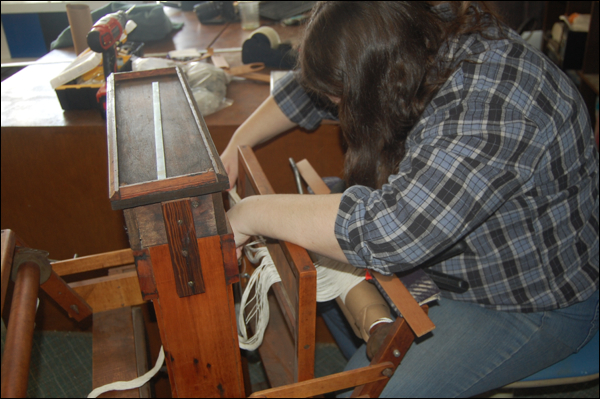
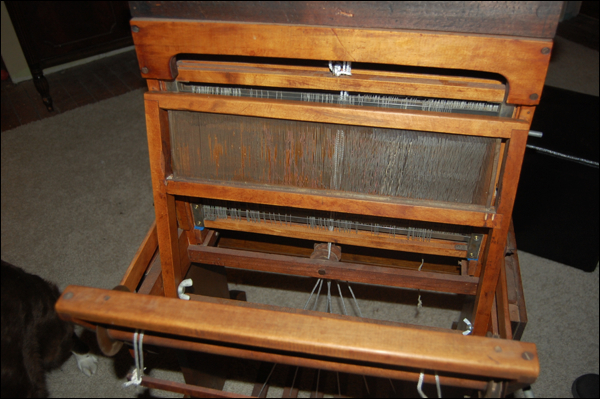
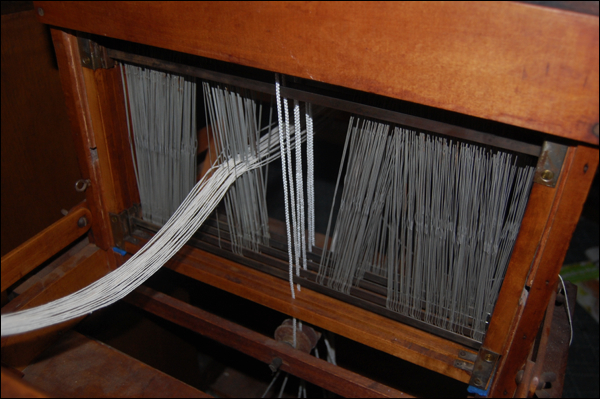
First she had to pull out one string from each spot in the reed to even out the reed’s threading. It seems a little tedious, and it is, but it only took her about half an hour. You can sit down and we have a little threading hook that works pretty good. So far, we have only spent about an hour total. Which is pretty keen. It took me two LONG days to first warp up Rosie! Warping and the weaving prep is a HUGE amount of time.
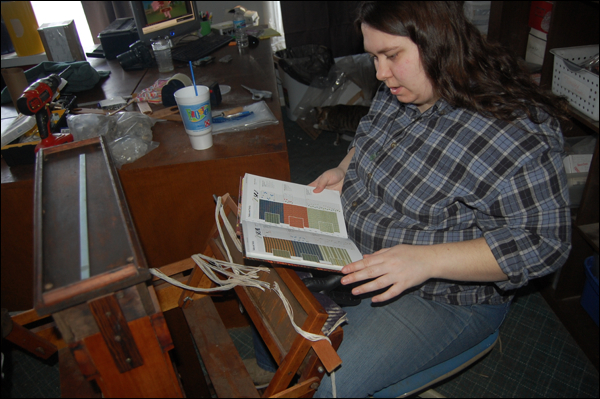
Once we had it all nice and neat through the reed properly, it was time to pick a pattern to thread through the heddles. The heddles, those little thing hanging metal bars, they are what makes the fabric’s pattern. Margaret is actually a 6 harness loom! Very unusual. They are usually 4 or 8 or 12… that sort of thing. However, we don’t have enough heddles to make her last two harnesses, so she’s a 4 harness at the moment. Which is good, because we only have a 4 harness pattern book! I imagine that you could just extend the patterns or look online. When we order some more heddles, we will give that a try! Right now, we just wanted to make sure she worked.
This time she is threaded 1-2-3-4-3-2-1 and repeat. Meaning, one string through the first heddle on the first harness… one in the second harness, one in the third, one in the fourth and then one in the third and so on. If you could imagine, this creates a sort of zig zag in the pattern. Like little mountains. You could thread it 1-2-3-4-1-2-3-4-1-2-3-4 or 1-4-2-3-1-4-2-3 or 1-3-2-4-1-3-2-4 and so on and so on! There are so many different variations with a four harness loom. Rosie is only a two harness loom… so she is only 1-2-1-2-1-2-1-2. Not a lot of thinking there! Of course, you could do 1-2-2-1-1-2-2-1-1-2-2 and get a wee bit of variation… but two harnesses mean not a lot of heavy thinking. I can only imagine the variations of a 12 harness loom!!!!! 1-12-3-6-5-2-11-6-8-7-3-2 hahaha… oh my goodness!
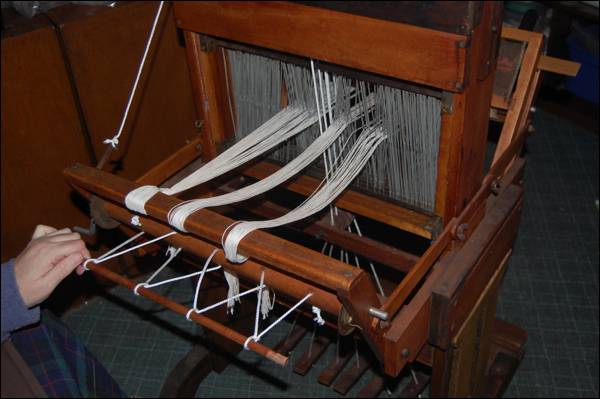
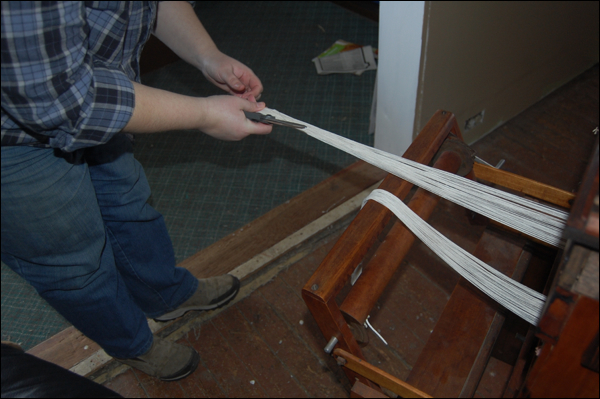
Once all the heddles where threaded in this pattern, the strings are tied off to the back take up stick. We had to restring this and the front ones because the old cording was ancient and fraying. Each bundle is tied up to the stick in groups. You could just tie them all in one big knot but it would take a lot of warp to “level out”. That means to be the full width of your weaving. When you seperate them into equal little bundles, you do a lot of the leveling out before you even start to weave and it saves a ton of warp and creates a much nicer tension on the loom. Tension is EVERYTHING on a loom!
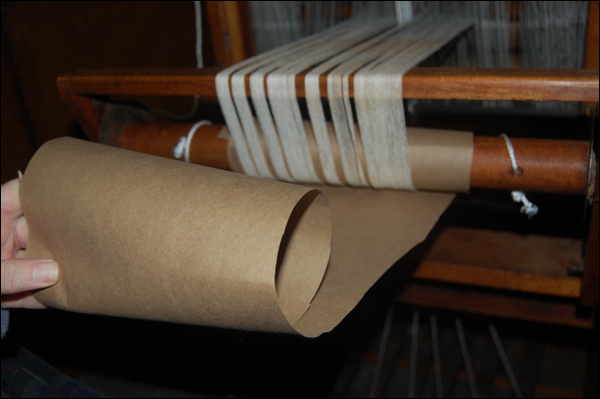
Again, we wound the warp on to the back beam and used brown paper. It really worked nicely. I highly recommend it. We have done it before on Ikea without and it is always a heartache. The paper, just really works nice!
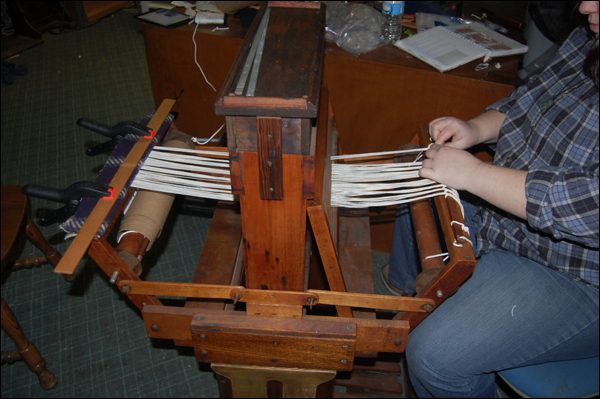
Once it was wound back on the front, we took the time to tighten up the front bundles and make it all nice and pretty. It might seem a little weird to wind it back and forth, but it’s just how you need to do it. And it really evens out the tension nicely. We are just barely into the second hour of warping. A world speed record for a brand new to us loom without an instruction guide of any kind. We were amazed. 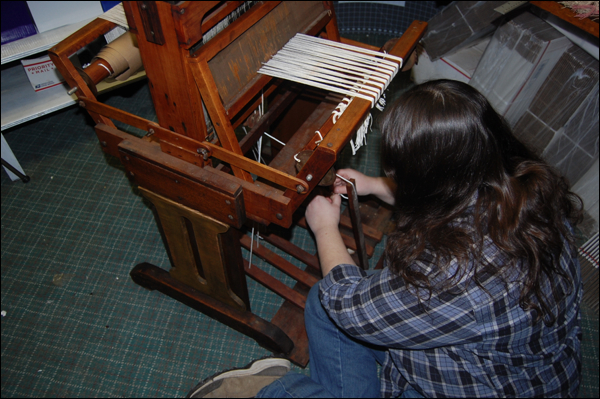
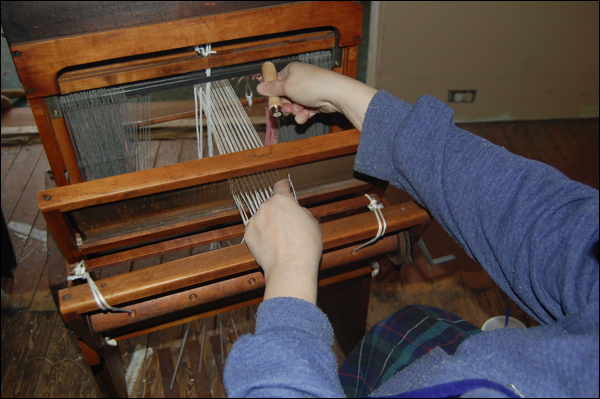
We started to get ready and weave but found that the peddles were not lifting the harnesses high enough. So Jess got down there and tied them up a little higher and it was perfection! Without any instructions to go by, it was all trial and error. Lots of little adjustments. We knew what we needed to do, just from other looms, but this one was a little tricky at times and we had our share of hmming and hawwwing. Tried one or two things that didn’t work. But overall, it was not too hard.
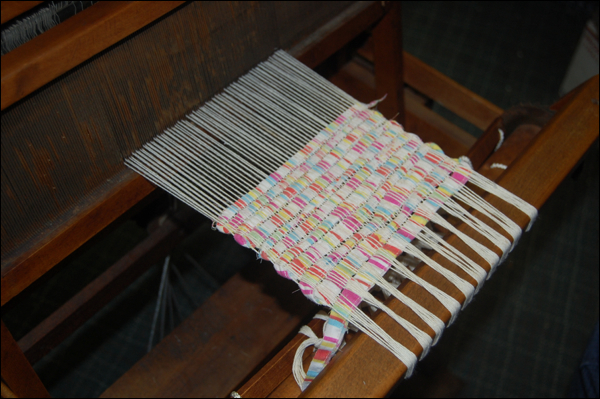
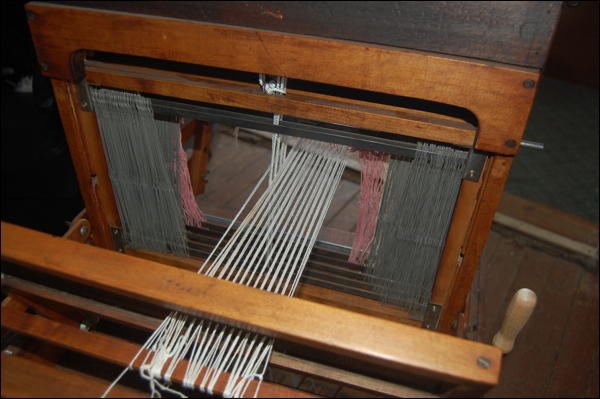
And look!!!! She WEAVES!!!! Oh my gosh! It was so exciting. She holds a beautiful tension, nice and even… Jess wove the first few shots of junk selvedge through… a process that is called leveling out. (At least in our house) As you can see, the first pass or two (called shots) were lumpy and a little weird, but by the 4th or so, it was getting nice and evened out. See how the tied bundles work nicely to help the process. To be honest, this little loom is the fastest leveler outter of all three looms we own! Rosie takes about 10 inches to level out, Ikea about 6 or 7. Margaret barely used 4 inches! A winner!
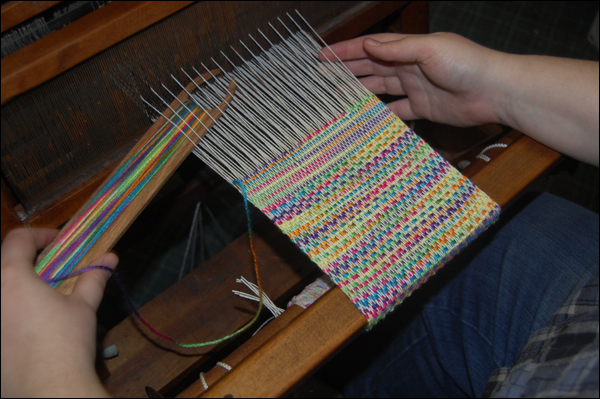
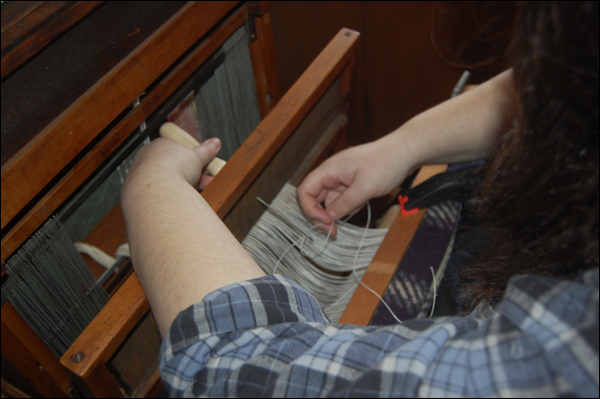
After a few more inches of the selvedge, we got one of Maggie’s new stick shuttles out and loaded it with some fun, celebratory variegated color yarn! So fun! And she began to weave some of the pattern that we set her up with. Such nice edges, such nice tension! The only thing, her shed is not very high. It’s the space when you lift a harness with the peddles and you slip your shuttle through. We are looking at this to see if we can adjust that a bit more. But she works fine, just a delicate little loom. So excited!!! 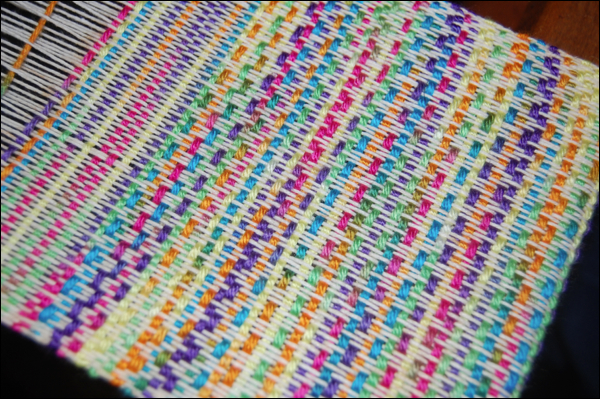
This type of loom was created for ladies to weave fine linens on. Placemats, napkins, tea towels, bread covers, table runners… these sorts of things. FIne cloth. She’s only 18 inches across, so that would be somewhat limiting. However, you could probably warp on a considerable length, especially if you used a finer thread. We just rug warp, with is fairly hefty. We have some lovely 5/2 mercerized cotton we are going to try next and weave some tea towels. Right now, we have about 10 feet of warp on and we are just going to fart around and play with the loom. Work out any kinks, see how she weaves. We have a few little issues to address… and will be trying to get the harnesses to raise up just a wee bit more. Even a half inch will be greatly appreciated. So far though, we are so pleased with this little gem! Not totally sure if she will stay in our stable, but so far, I think she has a very good chance of it. We would like to do more loom refurbishing, it’s really rewarding. If we were to resell her and make a tidy profit for our hard detective and repair work, then we could use that to buy a couple other old ladies and get them running right! In the meanwhile, we will sure be on the hunt for our next project loom!!! This was such a thrill to see to the end, we are sure to want to do this again!!! Yeah!!!!!!