
During my recovery time, I’ve taken to learning how to use an inkle loom. It’s a smallish, laptop loom that has been around since ancient times and that you can weave some mazing simple bands to use in all sorts of applications. Straps for bags, dog leashes and colors, instrument straps, camera straps, decorative trim on clothing, and even, well, straps!
I have a little small one that we got years ago and for some reason were intimidated by the lack of decent instructions and had just tucked it away. I just happened to see some beautiful weaving done by this awfully nice lady Anne McHale and then I found her blog and her Etsy shop and I was hooked. I just had to learn how to do this and off to You Tube University I went!
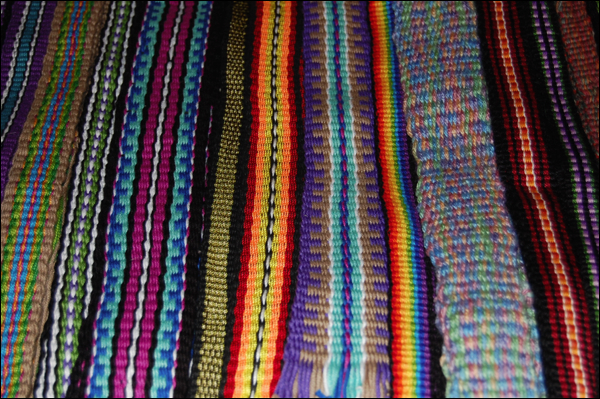
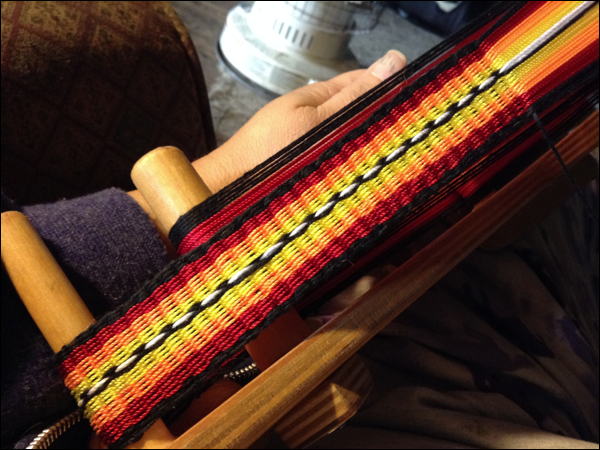
My first couple attempts were awful and frustrating, but I managed to stay with it and finally got to master novice stage! haha… A few of my more successful attempts are shown above!
However, like all good crafters starting on a new skill set, I had to try all sorts of weft materials and different designs and such and I soon began to realize that my loom was very lacking. It could only make about a 3 foot long band and that was just not enough to make instrument straps and good leashes and horse halters and all! I started to snoop around at the ones commercially available and they just had too expensive price tags! I started to find bits and pieces of people building their own and I decided to pick the best features and try and design one that my younger daughter Maggie could help and build! She is becoming a very talented young wood worker. And here are the pictures of our attempt!
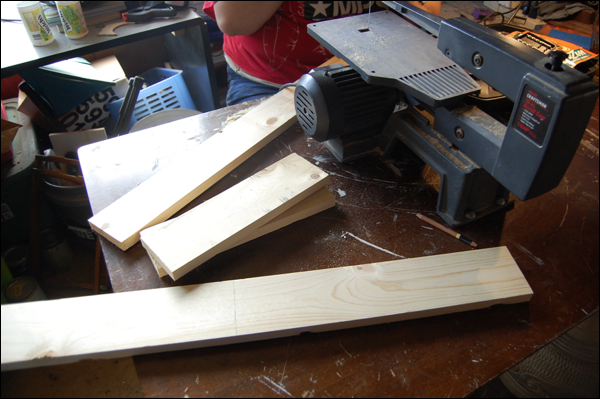
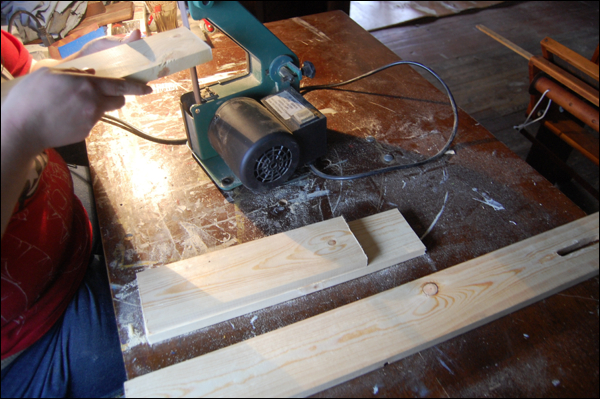
Inkle looms are really very simple in design… just a few things you have to remember. We choose to use a nice piece of pine we had. I’ve seen some very pretty ones out of oak and maple… perhaps another time! Our first attempt needed four pieces of lumber cut. The long keel piece… two arms and then a little foot so the loom would stand on a table top. Pretty easy. Our keel piece was 4 inch wide by 30 inches long. The arms, each 4 inch by 12 inch and the foot was 4 inch by 16 inches long.
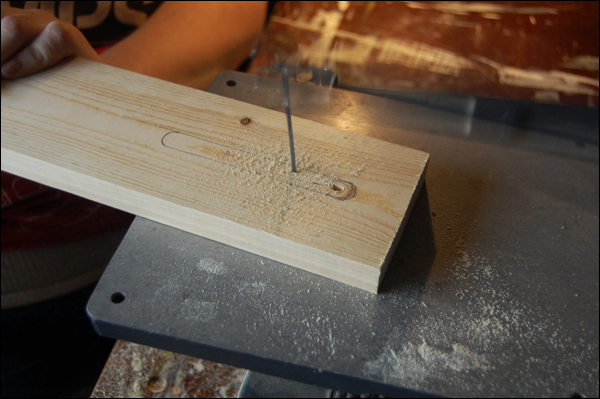
Perhaps the hardest part, requiring a scroll saw or some other small saw, perhaps a jigsaw, was cutting the tensioning slot. One of the pegs needs to be able to be tightened and loosened, so you can move and adjust the warp on the loom. Maggie prefers to use a scroll saw.
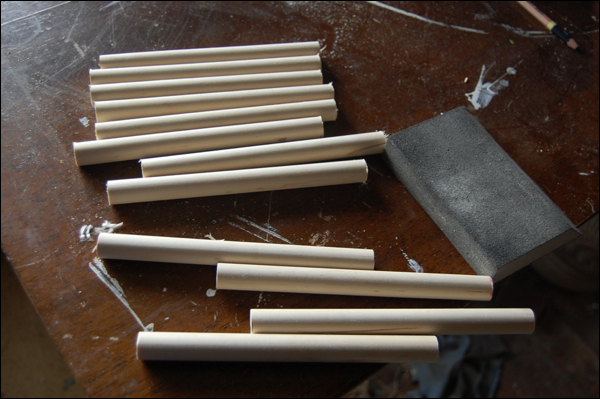
We cut up a 5/8″ thick dowel into 6 inch lengths and sanded them nicely so they don’t snag on the yarns and materials.
Maggie sanded all the sharp edges on the pine boards, and made it nice and comfy to hold on to.
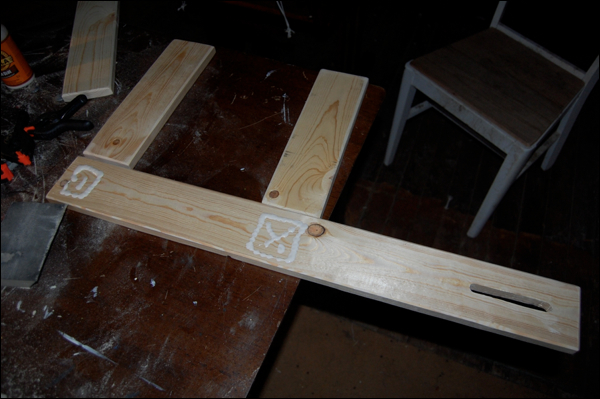
Then the two wings were glue into place. And a couple screws were put in to hold them securely. Inkle looms are under a good deal of pressure, so it’s good to be a little bit extra cautious. 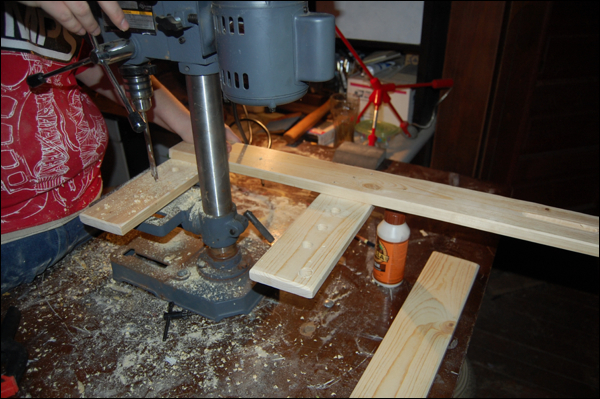
Once it was nice and dry, we marked out the positions of the pegs, looking at several other commercial looms and how they were placed. Pretty much we guessed. There are only a few pegs that are pretty crucial. That top one on the first arm… it needs to be off center and closer to the front of the loom. And there is one on the bottom, that needs to be placed a bit forward, as it holds the string heddles. 
Maggie sanded and made the holes nice and pretty. Pine is easy and soft, but it also spinters a bit when you drill holes, so she made it all pretty and beautiful! 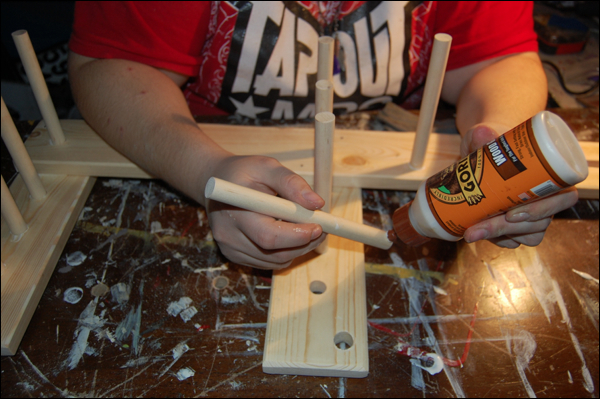
After all sanded, she glued them all in place and we let it all dry up. Added the little foot. The tension peg, we made with a special screw that has threads on each side… I will take some better pictures of it and add it to this post. 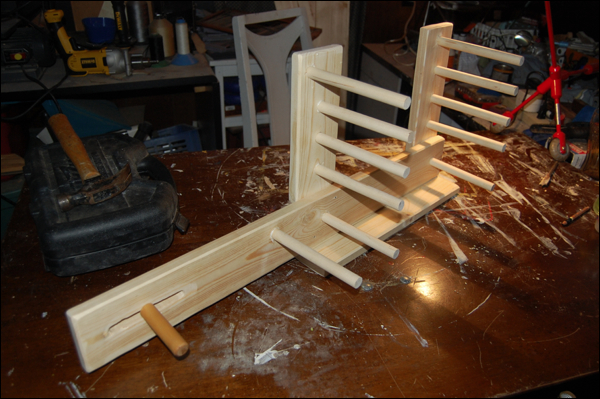
It works GREAT! We had to make one adjustment to it… On the first arm, the second peg was too close to the important offset first peg. So we had to remove it. You need the space to be able to open up the shed of the weaving easily. I will try and take another picture to show the final adjusted prototype. This baby is awesome… it will weave a 10 foot long strap!!!
Maggie is setting up her garage workshop as we speak, and once she’s all settled in and cozy, she wants to do a second prototype, one that will be a little smaller, and made a 6 foot strap. And be just a little easier to hold in your lap. And she intends to make the keel piece all one piece, with scroll saw cut out arms and such. Perhaps even in the shape of some fun or mythical creature! She’s like that! I can’t wait to see and play with the new one! But for now, this one is awesome and I am enjoying it. It took us about a good afternoon and about 10 dollars in materials! So great!

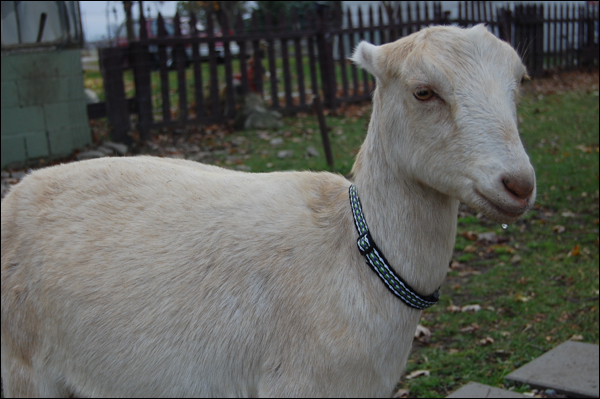
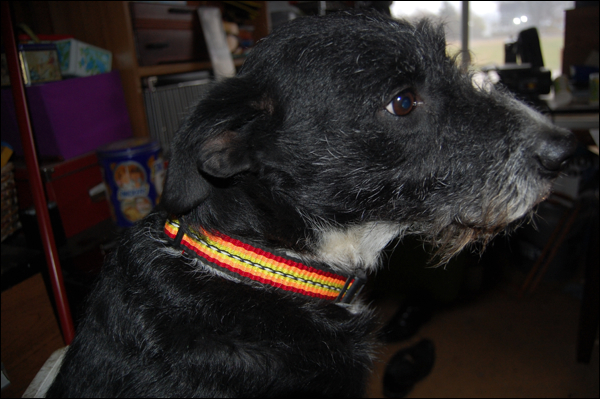
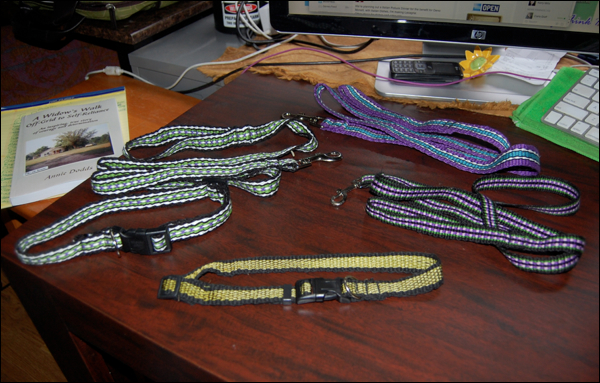
Buttercup got a new collar out of the deal, so pretty! It was one of my first attempts and I think it turned out just lovely. Ratchet got a nice flash red and oranges collar as well and he likes it very well. I also made a few more and some lovely leashes and will be putting them up on my Etsy shop soon. Now I can weave a much longer custom leash as well, and some camera and guitar straps! Yahoo! Such fun…
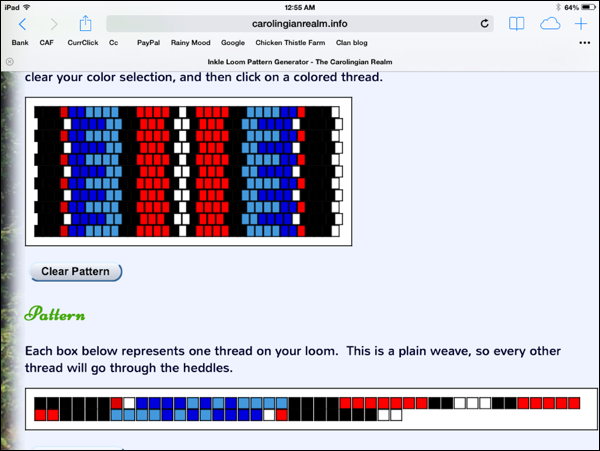
This is what a pattern looks like. You can design your own with this neato online generator… just google Inkle Loom Pattern Generator and it will come right up. I have to say, just making what we call plain weave, done by lifting and lowering your warp, is so beautiful and colorful and the designs are endless! I’m not sure if I have more fun weaving or looking on Pinterest at all the beautiful weavings! And of course, trying to figure them out and make them for me!!!
Love the collars on the goats Nice work! great colors!
Where did you get the buckles for your collars?
Well, a couple I got at the dollar store. I just snipped off their old plain webbing. But then I ordered some off the internet… just google dog collar buckles and there were quite a few people selling them. You need to buy usually 10 or 25, but they were cheaper than the dollar store. But if you just want one or two, then the dollar store is the place!
Sherri